I want to preface this blog post by saying I love Girl Scout cookies. LOVE THEM. As you know by now, I was a Girl Scout (and top cookie seller, obviously), so I support their cause and buy one or two or six boxes each year.
I’ve made several Girl Scout-inspired recipes throughout the years (like my Samoas Pie and Samoas Brownies), but it recently occurred to me that I have never honored Thin Mints. How rude of me! Chocolate and mint are such an incredible flavor combination which is probably why Thin Mints were voted America’s favorite Girl Scout cookie.
decided to create a Thin Mint recipe of my own because as much as I like the boxed cookie, I wanted a softer version. I’ve never really been a fan of crunchy cookies, or cracker cookies as I like to call them. I want something I can sink my teeth into. So I started checking out some recipes online to see how others replicated the classic cookie, but their recipes seemed like a lot of work. I didn’t want something that required you to roll out the dough and use a cookie cutter because I feel like the extra work can deter people from making a recipe. So I developed a cookie dough that doesn’t need to be rolled out or use cookie cutters.
Additionally, for the coating, I decided it would be best to use a recipe that could be poured over the cookies because it really is a pain to dip them. I saw a lot of people just use melted chocolate for the coating, but in my opinion, that’s not very flavorful or inspiring. So I came up with an icing that’s rich and creamy and made even better by using Challenge butter.
Challenge Dairy uses 100% real cream so the flavor of the butter really stands out, and when you use it you’ll see that it combines really well when you melt it together with the milk and cocoa powder. Challenge also uses hormone-free milk and there are not unnatural additives, so nothing stands in the way of the rich butter taste.
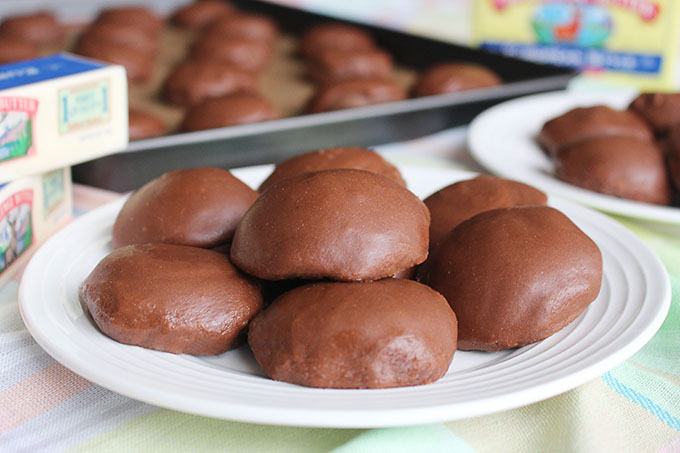
As you can see by my pictures, these cookies turn out thicker than the original, but that’s because they’re softer and chewier. — just the way I like them. The flavor is really outstanding, and I’m so excited with how these turned out! I won’t call these a copycat Thin Mint cookie because I don’t want to step on the Girl Scouts’ toes, but I will say these are a Thin Mint-inspired cookie that are so rich and addicting, you’ll have people lining up to buy them!
Servings
12 cookie
Cookies
- ½ cup Challenge Butter, room temperature
- ⅓ cup granulated sugar (67 grams)
- 1 egg
- ½ teaspoon vanilla
- ½ teaspoon peppermint extract
- 1 and ⅓ cup all-purpose flour (167 grams)
- 1 teaspoon baking powder
- ½ teaspoon salt
- ½ cup semi-sweet chocolate chips, melted
Icing
- ½ cup Challenge Butter, room temperature
- 2 Tablespoons cocoa powder
- 3 Tablespoons milk
- 1 teaspoon peppermint extract
- 2½ cups powdered sugar
Cookies
-
1
Preheat oven to 350°.
-
2
Line baking sheet with parchment paper or silicone mat and set aside.
-
3
In large bowl, beat butter and sugar together until light, about 2 minutes.
-
4
Add egg, vanilla, and peppermint extract and continue mix slowly until incorporated.
-
5
In a separate bowl, mix flour, baking powder, and salt.
-
6
Slowly add dry ingredients to butter mixture and mix on low until just combined.
-
7
In a microwave-safe bowl heat chocolate chips on high in 30-second intervals until melted, stirring every 30 seconds.
-
8
Add melted chocolate directly to bowl with cookie dough and mix until combined.
-
9
Scoop out dough in Tablespoon-sized mounds, roll into ball, and place on baking sheet.
-
10
Bake for 7 minutes; they’ll still appear very soft on the inside — that’s okay.
-
11
Let cool before coating with icing.
Icing
-
1
Add butter, cocoa powder and milk to medium saucepan on medium heat, whisking until melted together.
-
2
Remove saucepan from heat; stir in peppermint extract and whisk in powdered sugar.
-
3
Pour icing over cookies and allow icing to set before serving (about 1 to 2 hours).
-
!
Make this recipe gluten-free by replacing all-purpose flour with Cup4Cup Gluten-Free Flour. I baked these cookies below 3500 feet elevation. You can refrigerate dough for about 10 to 20 minutes first so it’s easier to work with.