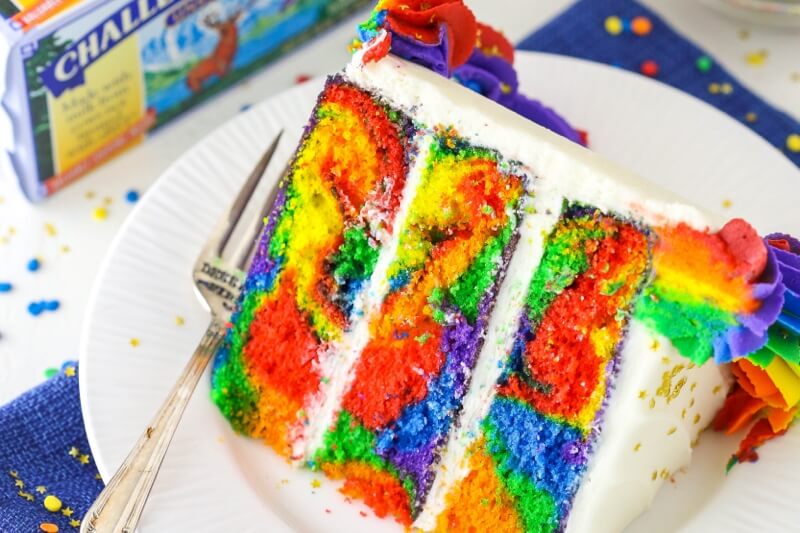
This Rainbow Swirl Cake is made with three layers of homemade rainbow cake, then decorated with rainbow swirl frosting around the edges! It’s a moist, delicious cake that’s easy to make and perfect for a celebration, kid’s birthday party cake or even St. Patrick’s Day!
This cake is fairly straight forward to make, though it takes a little time. The time is primarily from dividing the cake batter and frosting and then dying everything six different colors. Time consuming, but easy to put together, and so worth it in the end!
How to Make a Rainbow Swirl Cake
To get started making this cake, you’ll make the vanilla cake batter. After combining your dry ingredients – all purpose flour, baking powder and salt – and setting those aside, you’ll cream your butter, oil and sugar together. This can be one of the most overlooked steps when making cakes. I know because back when I first started baking, I didn’t really get it myself. Then one day I saw the difference and it clicked!
Beat the butter, oil and sugar together until you notice a very clear difference in the texture and color of the mixture. It’ll lighten in color and become light and fluffy in texture. This step adds air to batter that helps it rise and makes it lighter.
Once things are creamed, add your eggs and vanilla extract. Finally, add your dry ingredients and buttermilk by alternating adding them to the batter. Be sure not to over mix the batter. It can overdevelop the gluten in the flour and you end up with a tough cake. No fun!
As for the milk in this cake, I use buttermilk. It really lends a more tender cake in this instance, so I 100% recommend it. I know it’s a pain to buy a whole container of buttermilk, so do what I do and buy powdered buttermilk. It’s brilliant! You add a little of the powder to your dry ingredients, then add water when it’s time to add the liquid. The powdered buttermilk stays good for months in the fridge, so you can use it in later recipes without having to waste anything.
Rainbow Swirl Cake Technique
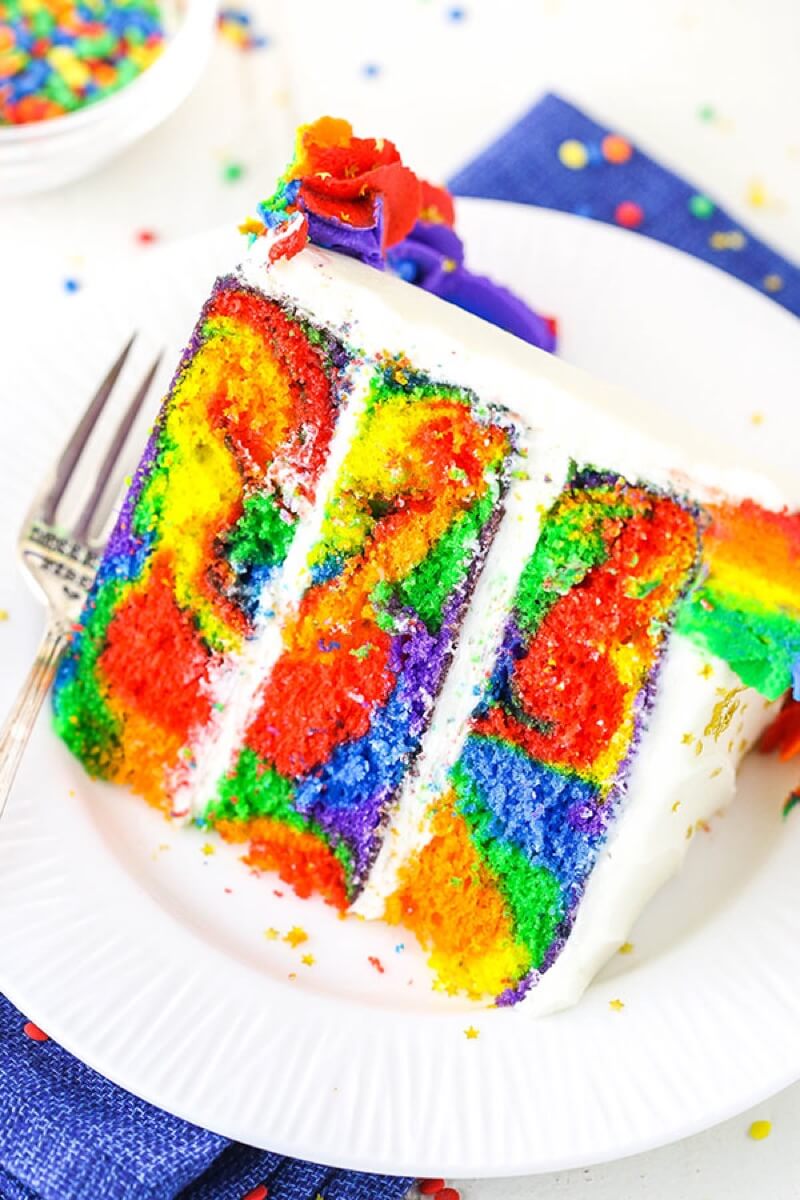
When it comes to the swirl, I spent a lot of time getting the batter for the swirl of this cake just right. You don’t want to use a batter that’s too thin or the colors will mix together, rather than staying separate. And even a batter that seems thick enough can sometimes end up with things not turning out quite right. This cake batter is great – the colors stay in place and bake up just right so that when you cut into your cake, you get a nice cross-section of color.
Once your batter is made, divide it evenly between 6 bowls. I used my scale to make sure everything was even, but if you don’t have a scale, it should be a little more than one cup per color.
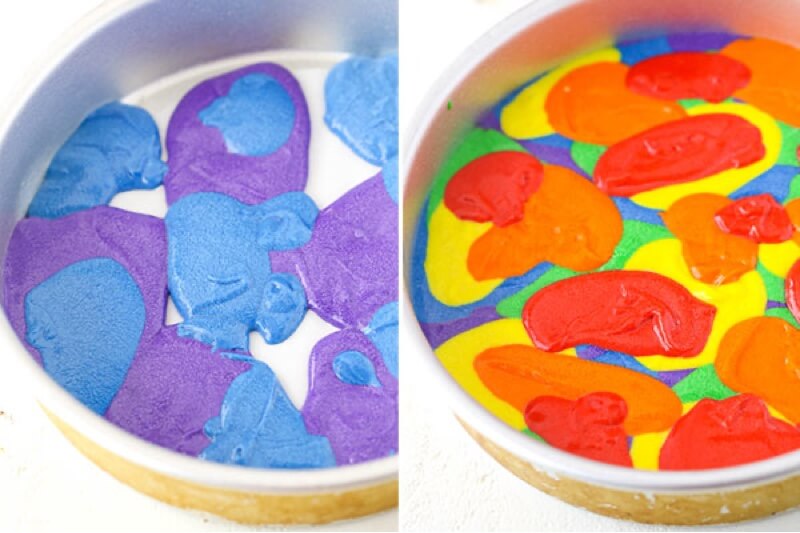
As far as technique goes, there’s really no wrong way to do it. It’s all about the look you want. For the cake you see in the photos, I dropped spoonfuls of color at a time, shaking the pan from side-to-side between each color to help the batter spread out a bit and color more area. You end up layering the colors on top of each other a little more, giving more of a “swirled” appearance.
But you could also drop larger spoonfuls around, more like in the video below, and have them be a little more pronounced. Totally up to you. Given the nature of the cake, you could make it 10 times and it’d be a little different every time. Part of the fun!
Once the cakes bake, let them cool completely before frosting them.
Rainbow Cake Frosting
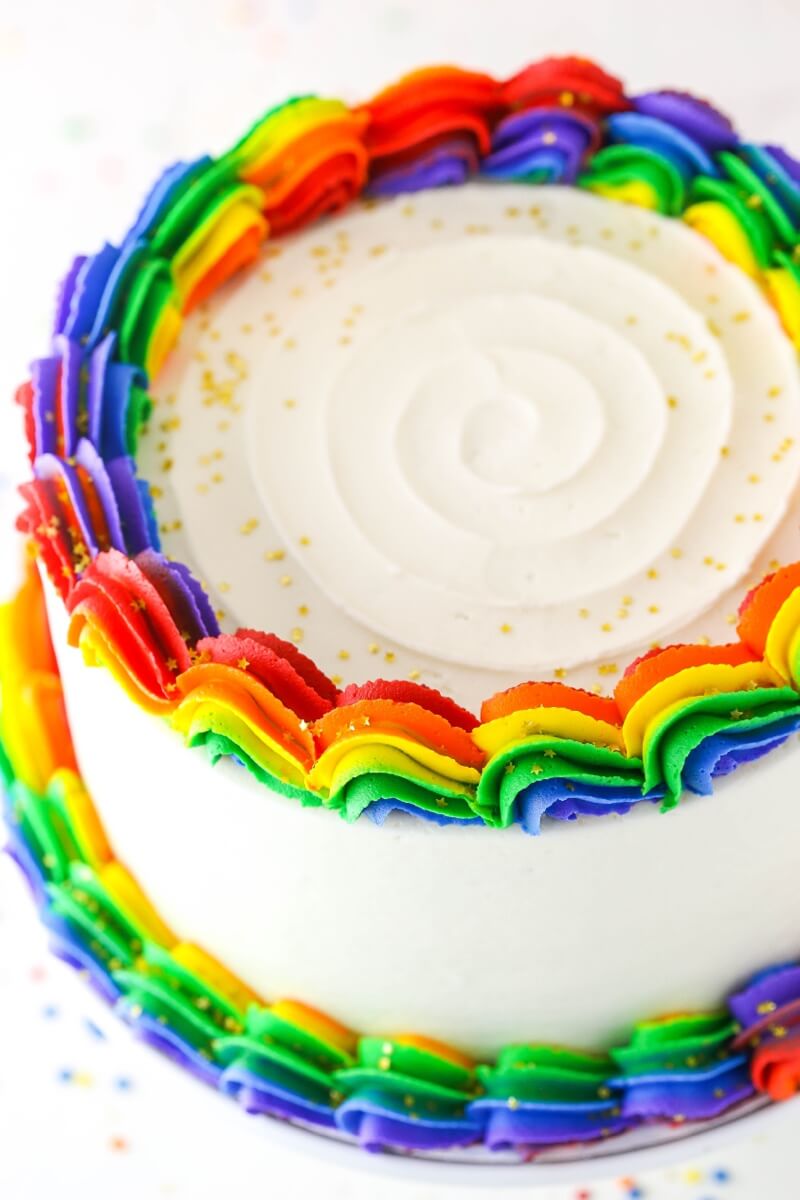
When it comes to frosting the cake, I really wanted to use white for the main color. It gives the colorful cake a bit of a “blank” background to stand out against. But of course you need to know what beauty is waiting for you inside so the rainbow piping is the perfect little hint.
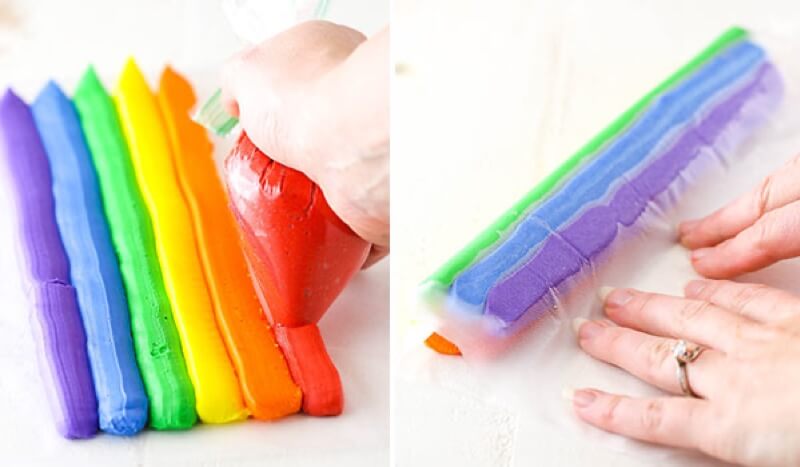
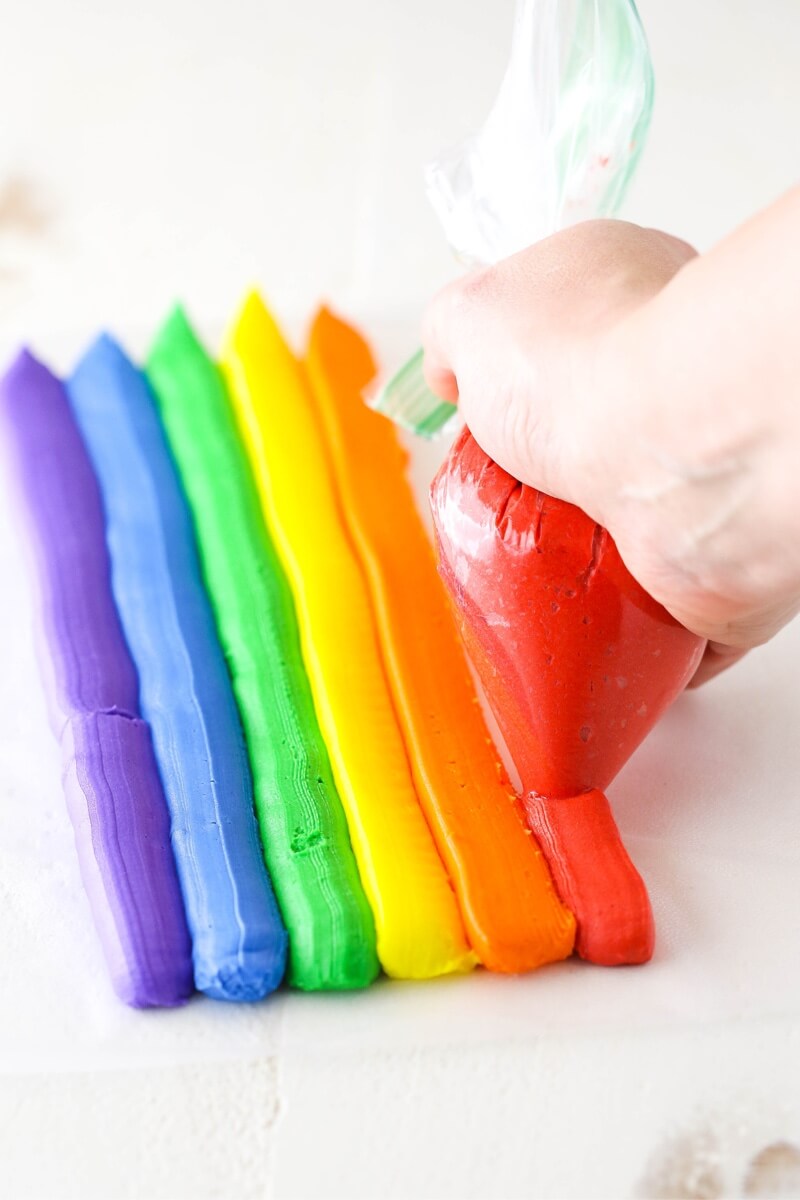
To create the effect, you’ll need to add all the colors to your piping bag. To do this, grab some clear wrap and pipe a line of each color right next to each other. Roll it up and place it into a large piping bag. Pipe the frosting shells around the cake and after each shell, give the piping bag a slight turn. That little turn gives the little rotating look of the colors in the piping. One of my favorite parts of the cake!
Cake
- 3 cups (390g) all-purpose flour
- 3 teaspoons baking powder
- 1 teaspoon salt
- ¾ cup (168g) Unsalted Challenge Butter, room temperature
- ¼ cup (60ml) vegetable oil
- 2 cups (414g) sugar
- 4 eggs
- 1 Tablespoon vanilla extract
- 1 ⅓ cups (400ml) buttermilk
- Violet gel icing color
- Royal Blue gel icing color
- Leaf Green gel icing color
- Lemon Yellow gel icing color
- Orange gel icing color
- Red gel icing color
Buttercream Frosting
- 2 cups (448g) Salted Challenge Butter, room temperature
- 1 cup (189g) shortening
- 11–12 cups (1265g-1380g) powdered sugar
- 1 Tablespoon vanilla extract
- 4–5 Tablespoons (60-75ml) water or milk
- Violet gel icing color
- Royal Blue gel icing color
- Leaf Green gel icing color
- Lemon Yellow gel icing color
- Orange gel icing color
- Red gel icing color
Directions
-
1
Prepare three 8 inch cake pans with parchment paper circles in the bottom and grease the sides. Preheat oven to 350°F (176°C).
-
2
Combine the flour, baking powder and salt in a medium sized bowl and set aside.
-
3
Add the butter, vegetable oil and sugar to a large mixer bowl and beat together until light in color and fluffy, about 3-4 minutes. Do not skimp on the creaming time. You should be able to see the change in the color and texture of the mixture.
-
4
Add the eggs two at a time, mixing until well combined after each. Add the vanilla extract with the second round of eggs. Scrape down the sides and bottom of the bowl as needed to be sure all ingredients are well incorporated.
-
5
Add half of the dry ingredients to the batter and mix until combined.
-
6
Add the buttermilk and mix until well combined.
-
7
Add the remaining dry ingredients and mix until well combined and smooth. Scrape down the sides of the bowl as needed to be sure all ingredients are well incorporated. Do not over mix the batter.
-
8
Divide the batter evenly between 6 bowls. It should be a little more than a cup per bowl.
-
9
Add gel icing color to the bowls (one color per bowl) and gently fold until the color is mixed throughout. You should have one bowl each of purple, blue, green, yellow, orange and red.
-
10
Add the colored cake batter to the cake pans. Starting with the purple batter, add spoonfuls of batter around the bottom of the pan. Divide each color evenly between the three pans. Give the pan a little side-to-side shake to distribute the batter around a bit between each color. After the purple, add the blue, then green, then yellow, then orange and finally red.
-
11
Bake for 28-33 minutes, or until a toothpick inserted comes out clean.
-
12
Remove the cakes from the oven and allow to cool for about 2-3 minutes, then remove to cooling racks to cool completely.
-
13
To make the frosting, add the butter and shortening to a large mixer bowl and beat until smooth.
-
14
Add about half of the powdered sugar and mix until well combined and smooth.
-
15
Add the vanilla extract and 2 tablespoons of water or milk and mix until well combined.
-
16
Add the remaining powdered sugar and mix until well combined and smooth.
-
17
Add additional water or milk as needed to get the right consistency.
-
18
To put the cake together, first remove the domes from the top of the cakes so they are level.
-
19
Place the first layer of cake on a cake plate or cardboard cake circle, then top it with about 1 cup of frosting and spread into an even layer.
-
20
Add the second layer of cake another layer of frosting.
-
21
Add the final layer of cake on top, the frost the outside of the cake. Feel free to use my tutorial for frosting a smooth cake, if you like.
-
22
Divide the remaining frosting between 6 bowls. I had about 1/3 cup of frosting per bowl, but you may have a little more or less, depending on how much you use to frost the cake.
-
23
Use the gel icing colors to color each bowl of frosting, using one color per bowl.
-
24
To make the rainbow swirl frosting border, add each color of frosting to a ziplock bag. Lay a piece of clear wrap out on the table. Trim the corner off of each ziplock bag. Pipe a thick row of each color of frosting in this order – purple, blue, green, yellow, orange, red – side-by-side onto the clear wrap.
-
25
Fold the clear wrap over into a long log (see photos above for guidance). Twist one end closed and trim the other end, if needed, so that the frosting is right at the end.
-
26
Put the log into a piping bag with the open end of the log going into the piping tip. I used piping tip Ateco 849.
-
27
Begin piping shells of frosting around the top edge of the cake. After each shell is piped, turn the piping bag just a little bit before piping the next shell. As you continue piping and turning the piping bag, you’ll get a rainbow that rotates around so you see all the colors.
-
28
To pipe shells around the bottom of the cake, create another log of rainbow frosting, add it to the piping bag and pipe shells around the bottom in the cake manner – turning the bag slightly after each shell.
-
29
Store cake in an airtight container until ready to serve. Cake is best for 2-3 days.